

NextJS×ReactJS× Typescriptでフォームバリデーション実装!npmパッケージを使用しない実装方法😎
こんにちは!
最近、NextJS と Typescript による実装が増えてきました。ReactJS とTypescript は相性が良く、高い開発効率を実現します。また ReactJS に限らず、VueJS でも Typescript を採用することが多く、Typescript は今や私たちのフロントエンド開発のデファクトスタンダードと言えます。
加えて Amplify を使用した graphql 実装を行う際、schema.graphql のデータ定義から自動的にAPIの型情報を生成することができるため、graphql 開発とも相性が良いですね。
本記事では、ReactJS と Typescript で堅牢なフォームバリデーションの実装方法を紹介します!
想定する読者
- NextJS・RaectJS でフロントエンドを実装しているヒト
- ReactJS・Typescript でフロントエンドを実装しているヒト
- フロントエンドの開発を Typescript で検討しているヒト
はじめに
ReactJS でフォームのバリデーションを実装する場合、 React Hook Formをはじめとした npm モジュールの使用を検討することができます。実際私たちもプロ実装がシンプルになるので使用するケースがしばしばあります。
React Hook Form の実装イメージ(Typescript)
import React from 'react';
import { useForm, NestedValue } from 'react-hook-form';
import { Autocomplete, TextField, Select } from '@material-ui/core';
import { Autocomplete } from '@material-ui/lab';

type Option = {
  label: string;
  value: string;
};

const options = [
  { label: 'Chocolate', value: 'chocolate' },
  { label: 'Strawberry', value: 'strawberry' },
  { label: 'Vanilla', value: 'vanilla' },
];

export default function App() {
  const { register, handleSubmit, watch, setValue, formState: { errors } } = useForm<{
    autocomplete: NestedValue<Option[]>;
    select: NestedValue<number[]>;
  }>({
    defaultValues: { autocomplete: [], select: [] },
  });
  const onSubmit = handleSubmit((data) => console.log(data));

  React.useEffect(() => {
    register('autocomplete', {
      validate: (value) => value.length || 'This is required.',
    });
    register('select', {
      validate: (value) => value.length || 'This is required.',
    });
  }, [register]);

  return (
    <form onSubmit={onSubmit}>
      <Autocomplete
        options={options}
        getOptionLabel={(option: Option) => option.label}
        onChange={(e, options) => setValue('autocomplete', options)}
        renderInput={(params) => (
          <TextField
            {...params}
            error={Boolean(errors?.autocomplete)}
            helperText={errors?.autocomplete?.message}
          />
        )}
      />

      <Select value="" onChange={(e) => setValue('muiSelect', e.target.value as number[])}>
        <MenuItem value={10}>Ten</MenuItem>
        <MenuItem value={20}>Twenty</MenuItem>
      </Select>

      <input type="submit" />
    </form>
  );
}
実装に着手する前に、工数が大幅に下がる可能性を考え、独自実装ではなくnpm モジュールの使用を一度検討してみましょう。React Hook FormはTypescript に対応しているのでオススメのモジュールです。
npmモジュールを使用しないフォームバリデーション実装方法
概要
以下の方針で実装を行います。
- フォームで入力された値をリアルタイムでバリデーション
- 全ての入力値を State に保持し submit 時に取り出せるような設計にする
- Error 内容も同様に submit 時に取り出せるような設計にする
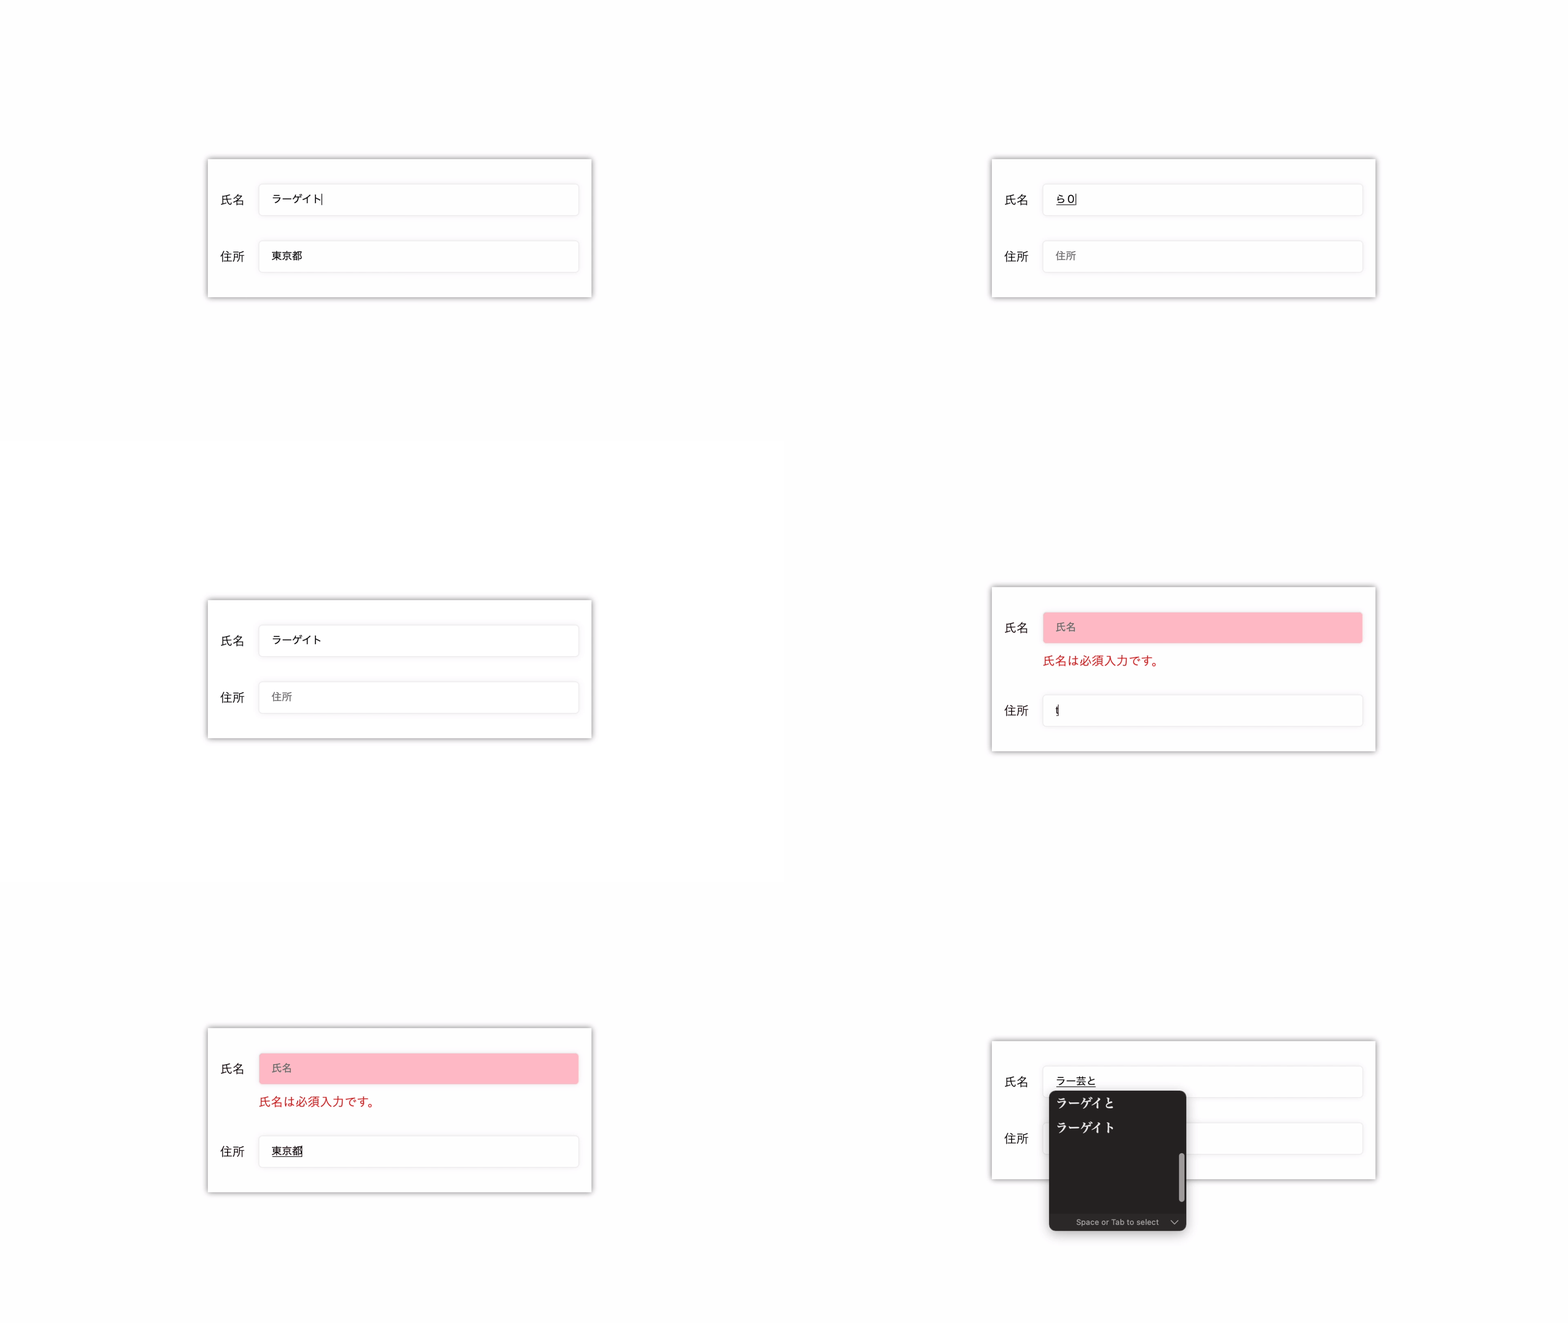
完成イメージ
フォームで入力した値を必須として、リアルタイムにバリデーションします。

サンプルコード
先にソースコードを一式共有します!(後述で解説)カスタムしやすいように多少冗長に書いていますので、適宜修正してみてください。
pages/sample.tsx
import styles from '~/styles/pages/Sample.module.scss'
import React, { Component } from 'react'
import { ReactNode } from '~/node_modules/@types/react'

enum INPUT_NAME {
  name = 'name',
  address = 'address'
}

type ERROR = {
  message: string
}

type LABEL = {
  [key in INPUT_NAME]?: string
}

interface State {
  inputValues: {
    [key in INPUT_NAME]?: string
  }
  inputError?: {
    [key in INPUT_NAME]?: ERROR
  }
}

export default class Sample extends Component<unknown, State> {
  label: LABEL = {
    [INPUT_NAME.name]: '氏名',
    [INPUT_NAME.address]: '住所'
  }

  constructor(props: any) {
    super(props)
    this.onChangeRequiredInput = this.onChangeRequiredInput.bind(this)
  }

  onChangeRequiredInput(name: INPUT_NAME, value?: string): void {
    const inputError = this.state && this.state.inputError ? this.state.inputError : {}
    const inputValues = this.state && this.state.inputValues ? this.state.inputValues : {}
    this.setState({
      inputValues: {
        [name]: value,
        ...inputValues
      }
    })
    if (!value || value === '') {
      this.setState({
        inputError: {
          [name]: {
            message: `${this.label[name]}は必須入力です。`
          },
          ...inputError
        }
      })
    } else {
      if(inputError && inputError[name]) delete inputError[name]
      this.setState({
        inputError
      })
    }
  }

  render() {
    const renderInput = (name: INPUT_NAME): ReactNode => {
      const inputError = this.state && this.state.inputError ? this.state.inputError : {}
      if (inputError && inputError[name]) {
        return <div className={styles.inputContainer}>
          <div className={styles.inputContainer__inputWithLabel}>
            <label className={styles.label} htmlFor='name'>{this.label[name]}</label>
            <input className={`${styles.input} ${styles['--error']}`} id='name' type='text' placeholder={this.label[name]}
                   onChange={(e) => this.onChangeRequiredInput(name, e.target.value)} />
          </div>
          <p className={styles.error}>{inputError[name]?.message}</p>
        </div>
      }
      return <div className={styles.inputContainer}>
        <div className={styles.inputContainer__inputWithLabel}>
          <label className={styles.label} htmlFor='name'>{this.label[name]}</label>
          <input className={`${styles.input}`} id='name' type='text' placeholder={this.label[name]}
                 onChange={(e) => this.onChangeRequiredInput(name, e.target.value)} />
        </div>
      </div>
    }

    return (
      <div className={styles.container}>
        <div className={styles.container__contentContainer}>
          {renderInput(INPUT_NAME.name)}
          {renderInput(INPUT_NAME.address)}
        </div>
      </div>
    )
  }
}
styles/pages/Sample.module.scss
.container{
  width: 100vw;
  height: 100vh;
  display: flex;
  align-items: center;
  justify-content: center;
  &__contentContainer{
    width: 500px;
    background: #fff;
    box-shadow: 0 0 8px gray;
    padding: 16px 0;
  }
}

.label{
  width: 50px;
}

.input{
  border: 1px #eee solid;
  box-shadow: 0 0 8px #eee;
  border-radius: 5px;
  padding: 10px 16px;
  flex: 1;
  &:focus{
    outline: none;
  }
  &.--error{
    background-color: pink;
  }
}

.error{
  margin: 10px 0 0 50px;
  color: red;
}

.inputContainer{
  padding: 16px;
  flex-wrap: wrap;
  border-radius: 5px;
  &__inputWithLabel{
    width: 100%;
    display: flex;
    align-items: center;
  }
}
ポイント解説
enum と type を組み合わせた型制約
以下の箇所で、enum で定義した name しか受け付けないように型制約を行っています。
enum INPUT_NAME {
  name = 'name',
  address = 'address'
}

type ERROR = {
  message: string
}

interface State {
  inputValues: {
    [key in INPUT_NAME]?: string
  }
  inputError?: {
    [key in INPUT_NAME]?: ERROR
  }
}これにより、入力値及び入力値に対するエラー内容に不正な情報が流れないように実装することが可能です。プロジェクトによっては enum を使用してはいけないケースもあるので、その際は別の方法を検討しましょう。
render を極力シンプルに実装する
バリデーションに限らず、ReactJS の JSX 実装はしばしば DOM 構造が複雑になりがちです。私たちは可能な限り render メソッドで返す ReactNode を以下の指針でシンプルに実装するよう心がけています。
- 極力繰り返し処理を使用し短く記述
- render 関数を細かく分け、状態( State/Props 依存)を持つ DOM は関数から返却
上記に限らず、JSX の実装は可能な限り、VueJS のように素直に HTML を記述するよりも、プログラミング的に動的に生成するのが望ましいと考えています。この辺りは好みが分かれそうですね。
まとめ
本記事では ReactJS によるフォームバリデーション実装を紹介しましたが、規模が大きくなると複雑になりやすいため、可能な限り npm モジュールの使用を検討してみてください。
npm モジュールの採用は、私たちは以下の指針で検討しています。(状況によっては以下に該当しないモジュールを採用する事も有)ぜひ参考にしてみてください。
- スター数は類似するモジュールの中で TOP3 以内であること
- 直近1ヶ月以内にリポジトリが更新されていること
- 社内のエンジニアへドキュメントを回して可読性について意見交換・検討
NextJS・ReactJS・Typescript の開発はお気軽に相談ください。
スモールスタート開発支援、サーバーレス・NoSQLのことなら
ラーゲイトまでご相談ください
低コスト、サーバーレスの
モダナイズ開発をご検討なら
下請け対応可能
Sler企業様からの依頼も歓迎


